|

All
information presented
on this website is
presented 'as is',
with no warranty,
suitability,
or fitness
of purpose implied.
I do not accept any
responsibility for any injury
resulting from use
or misuse
of this information.
Your
use of this information
constitutes acceptance
of these terms. |

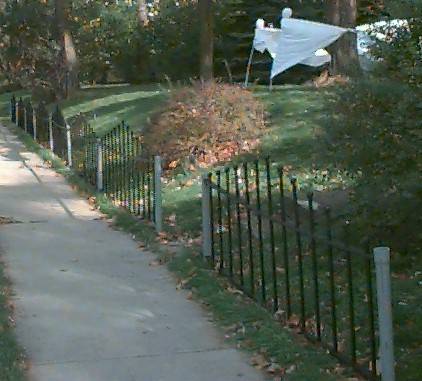
You have all seen the fence (picture below) I have done last year. Now
I am considering a gate to jazz this up a bit.
.
I propose to
fabricate most of it from foam board with some minor wood internal
framing. Ideally the whole thing will weight very little and will be
in sections, pillars, arch, sign, and doors will all be separate
parts for ease of storage.
![[Click to enlarge image]](images/gate/tn_gate060.jpg) ![[Click to enlarge image]](images/gate/tn_gate061.jpg)
The real finished
gate 2003 haunt below
The fabrication has begun, and I have chosen to switch gears a
tad. Instead of my usual Liquid Nails (LN) for quick assembly, I went
with Poly - Urethane based glue instead. Its not quite as easy as LN, but in
the long run, for something of this scale, I believe it to be the
better choice.
The reason it is more
difficult to work with, is it is messy and tenacious. I made the
mistake of not using gloves with this stuff, and unfortunately, I had
been scavenging in a warehouse sale earlier in the day. My hands now
look filthy, but in reality are quite clean, but will look this way
for a few days yet.
The glue is slimy as
well. Liquid nails is tacky as you work with it, you have relatively
little time after the initial squeeze and pry to position your parts.
Also it is forgiving, you can manipulate your pieces into position,
and expect them to stay. With the glue, you will find it is difficult
to keep your parts IN position, and if you have any bow, or waves in
your materials, they will want to stay that way.
However, Liquid nails
will not fill gaps after the fact, so you either have to be very
generous in your application of it, and clean away the excess after it
cures, or fill gaps with putty, spackle, joint compound or the like.
The glue will foam and
expand, nicely filling gaps as it cures, which is really handy.
Additionally, it is very similar in structure to the foam board we
make props with. This makes for easy clean up after the fact. Plus you
will rarely have to fill gaps after you have the prop glued together.
Some items you want to
have on hand for this type of construction:
Latex gloves - the surgical type,
snug fit so your hands aren't swimming in them. If you are latex
sensitive, you can get non-latex versions.
Poly - Urethane based glue -
(PUG for short) available at
most hardware stores.
Liquid nails - (LN for short) I know I know, I said
I was going to use the PUG for the project, but certain steps really
needed the quick sticking power of LN. Us e the projects or foam
products version for this type of project.
Brushes - cheap, bristle type,
sometimes called acid flux brushes, with metal handles, I get them for
20 cents each at HD in the plumbing section, they will last approx. 45
minutes before you need to chuck them, maybe longer if you really want
to clean them. For spreading the glue.
Spray bottle - filled with water. The
glue is moisture reactive, this makes it easy to wet large areas, you
can also spray more water on a joint when you don't see seam expansion
after the first 10-15 minutes after items are joined.
Clear packing tape - use this to
bind your parts together while the glue sets.
Click knife - the type of box
cutter knife with the long segmented blades that you snap of the piece
when it gets dull, and have a new sharp segment waiting. Superb for
trimming excess after the prop has cured.
Aluminum foil or wax paper - the
nice thing about this glue is you can end join sections of foam to
make a larger slab
Surform - this is a woodworking tool used
to trim small amount from edges. It has a cheese grater like base,
with a body that fits your hand. I'll point it out in a picture later.
Excellent for cleaning up after trimming, and before block sanding.
Hot glue gun
- This was needed to temporarily tack down glue blocks and jig blocks
for making the large curves of the sign and arch.
Shims
- Cedar shake shims work very well since the are a variety of widths,
and a large bundle costs very little. Very convenient for getting
edges and faces to meet flush while gluing.
This whole project I
thought was going to take some 8-9 panels of 4x8' blue extruded foam
board. Lets call that a slight miscalculation, as in reality I needed
15 panels to do the whole thing, 5 alone just to do the doors.
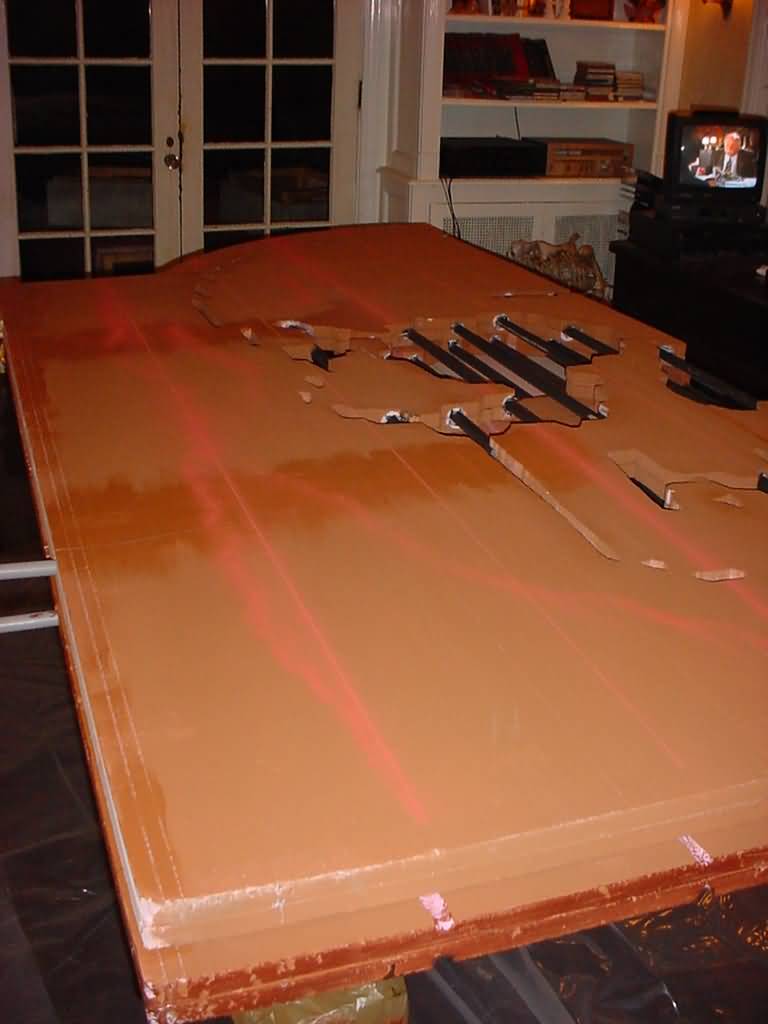
To start with, pieces
of foam were cut to make the base and capstones for the pillars.
![[Click to enlarge image]](images/gate/tn_gate1.jpg) ![[Click to enlarge image]](images/gate/tn_gate2.jpg)
![[Click to enlarge image]](images/gate/tn_gate3.jpg) ![[Click to enlarge image]](images/gate/tn_gate4.jpg)
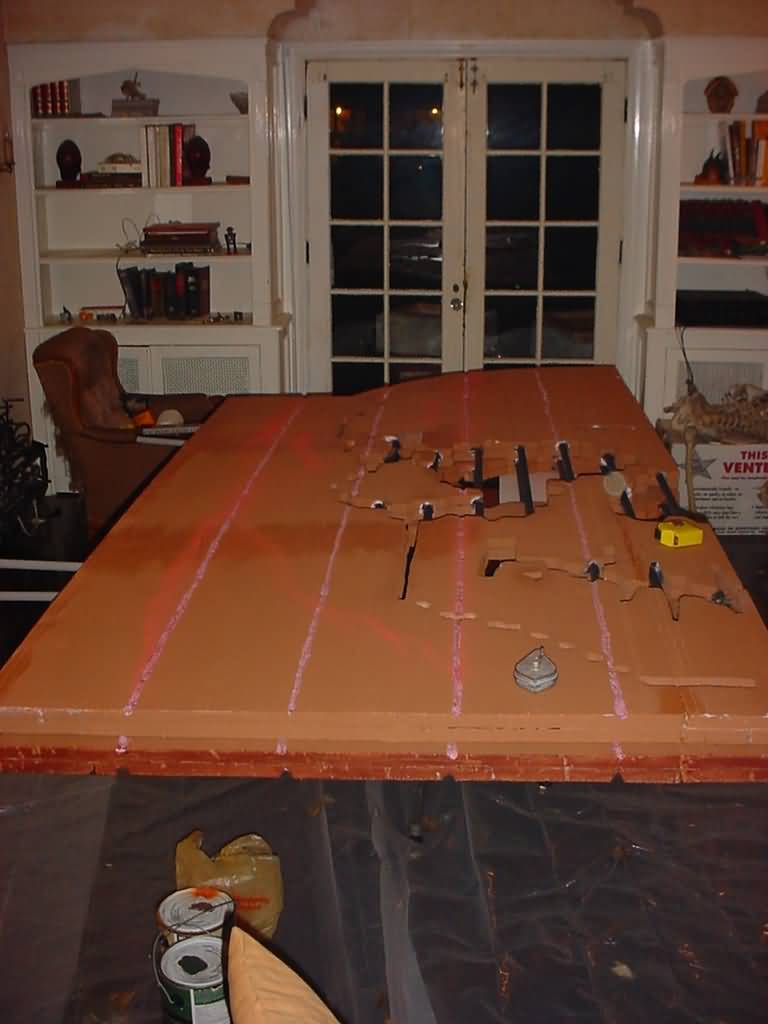
Once all the pieces were cut, they were assembled into the
sections using the urethane glue. Each edge and or face to be glued
was wetted with water from a mister, then glue applied, placed
together, and then secured temporarily with packing tape. As each
module was finished, it was allowed to dry for 1.5 hours minimum,
typically sitting for 4 hours. Once cured or set, I would come back
with the click knife, extended as long as it can go (this knife has a
blade about 3/8" wide) which is roughly 4", and I would trim
all the excess glue, which now looks like expanded great stuff.
![[Click to enlarge image]](images/gate/tn_gate5.jpg) ![[Click to enlarge image]](images/gate/tn_gate6.jpg)
All the foam cut for the base, capstones, and pillars, and an
assembled base stone that is just been glued and taped for curing.
![[Click to enlarge image]](images/gate/tn_gate7.jpg) ![[Click to enlarge image]](images/gate/tn_gate8.jpg)
Just some pics showing the items needed to glue the foam
together.
![[Click to enlarge image]](images/gate/tn_gate9.jpg) ![[Click to enlarge image]](images/gate/tn_gate15.jpg)
An assembled capstone waiting to have the top plate glued in
place, and a finished capstone being cleaned of excess glue, and
formed a bit with the surform. Once the bulk of the material is
removed from gluing, I would surform the pieces a bit to get the
seams flush, then use either a piece of scrap foam or a sanding block
to give me the finished shape, which was typically just rounding the
corners and edges.
![[Click to enlarge image]](images/gate/tn_gate10.jpg)
Here is the stack of glued base and capstones that are in various
stages of progress.
![[Click to enlarge image]](images/gate/tn_gate11.jpg) ![[Click to enlarge image]](images/gate/tn_gate12.jpg)
The pieces parts for making the brick pillars. I chose to
economize by making the pillars from 2 sheets rather than 4, but
cutting them from the width, instead of the length, and then gluing the extra length need on from the scrap of the second sheet. This glue
makes it a breeze to make LARGE pieces, as you will see further on.
Also a shot of the pieces glued and waiting to cure.
![[Click to enlarge image]](images/gate/tn_gate13.jpg) ![[Click to enlarge image]](images/gate/tn_gate14.jpg)
A close up of the seams and how they are set up for gluing, note
the aluminum underneath to prevent them from being glued to the table
top. Next is a shot of some finished panels before gluing together
into the pillar form.
![[Click to enlarge image]](images/gate/tn_gate16.jpg) ![[Click to enlarge image]](images/gate/tn_gate17.jpg)
Here is a few pictures of the pillar construction. As you can see,
the foam board from Home Depot gets abused and warped, so some tape
was used to maintain a nice even distance along the length.
![[Click to enlarge image]](images/gate/tn_gate18.jpg) ![[Click to enlarge image]](images/gate/tn_gate19.jpg)
Much of the work was
done concurrently, until flat work surfaces ran out.
![[Click to enlarge image]](images/gate/tn_gate20.jpg)
This is a shot of making
the template using the home-made compass. Making the template for the
sign was tricky, considering the sign is 9' across. I tried using one
of those craft projectors to allow me to trace the lettering onto the
craft paper (very difficult in a work shop full of items). While doing
this juggling contest, it occurred to me to use good old geometry and a
giant home-made compass (you can cut a thin strip of luaun plywood
and drill holes to your needed distances, pinning one end (used a
drywall screw) and inserting a sharpie in the other) to make the
sign outline, then just adjust the paper to the projected image to get
the lettering to scale. Just after finishing that method one of the Halloween-L
folks suggested a program called Poster7,
this probably would have worked out well, but the sign template was
complete.
![[Click to enlarge image]](images/gate/tn_gate21.jpg) ![[Click to enlarge image]](images/gate/tn_gate22.jpg)
Once the template was drawn, it was trimmed of excess and used to
trace the pattern onto the foam. Since the sign was so large, the sign
parts were made in halves, and then the sections glued together to
form the whole face.
![[Click to enlarge image]](images/gate/tn_gate23.jpg) ![[Click to enlarge image]](images/gate/tn_gate24.jpg)
Here you see the pieces being glued together, note how they are
stacked to save time and space. The next shot shows some trimmed walls
and end strips about 5" wide. Due to the nature of the arc of the
sign, it wasn't necessary to slot the inner surface of the foam to make
the bend, since it was rather large compared to the 3D tombstones.
However it was necessary to make support/gluing blocks, and jig
blocking to hold it all steady.
![[Click to enlarge image]](images/gate/tn_gate25.jpg) ![[Click to enlarge image]](images/gate/tn_gate26.jpg)
First place small blocks on the exterior of the curve with hot glue to
the table top, not the face piece, that is to have a wall attached to
it (second picture) that are tall enough to catch the bottom edge of
the wall piece. Glue one more on the opposite side (as seen on the
extreme right of the first picture) to hold the whole thing in
place, since the force applied bending the foam to fit will make the
whole setup want to slide away.
Use a pair of nice sturdy weights to
hold things as you progress. 1 gallon paint cans full will do nicely
in a pinch, and any haunter worth their salt will have many oops cans
from the hardware stores on hand.
After the retaining blocks are in
place, use 1 weight to hold the very end of the wall in place, and hot
glue a block of foam onto the face piece to hold the curve of the wall
(see first picture above), allow it to cool, and then adjust
your weight to form the curve of the wall appropriately as you go
along, hot gluing more blocks to maintain the form.
Once
you have all the interior gluing blocks in place, remove the
wall piece of foam, wet it and apply the urethane glue, then
bend the wall back into place, and secure with packing tape.
Shim if needed to make faces meet. Once all is taped, and
shimmed, I like to apply another bead of PUG and then spray
all exposed seams with the water bottle to facilitate
curing. You can see how this looks in the photo below. The
sign was set aside to let it fully cure before installing
reinforcement, lights, and hooks for hanging.
![[Click to enlarge image]](images/gate/tn_gate27.jpg)
![[Click to enlarge image]](images/gate/tn_gate28.jpg)
![[Click to enlarge image]](images/gate/tn_gate29.jpg)
A few tools used to
create the brick facades on the pillars. Initially I made the grooves
that would define the bricks and serve as mortar with the wood burning
tool using the temperature controller
for finesse control. Once the brick patterns were made the pillars
were stood upright, and sprayed with water from the squirt bottle. I
then took a propane torch and with a pretty light flame worked across
the surface of the pillar pitting it much like rough brick face.
![[Click to enlarge image]](images/gate/tn_gate30.jpg)
After the initial pass on each face, I went back over the
mortar joints with the torch to rough up the brick edges a bit,
followed by adding a spreader to the torch tip, rewetting the pillars
and making another pass over them again with the spreader tip.
![[Click to enlarge image]](images/gate/tn_gate32.jpg)
![[Click to enlarge image]](images/gate/tn_gate33.jpg)
You can see a side by side comparison of a finished and
unfinished pillar in the pictures above.
|
![[Click to enlarge image]](images/gate/tn_gate34.jpg)
![[Click to enlarge image]](images/gate/tn_gate35.jpg)
With the pillars surfaced and
waiting to dry off, and be painted, it was on to the sign again, which
at this point has had the lights installed (rope lights) reinforcing
strips of luaun ply along the top wall, the hanger hooks and the other
face glued in place. I thought I had taken pictures of this, but
cannot locate them, they will be added if I ever come across them. In
these pictures you can see the template has been applied, and with a
rotozip type bit in the dremel and the router base attached, the
letters have been cut out.
![[Click to enlarge image]](images/gate/tn_gate36.jpg) ![[Click to enlarge image]](images/gate/tn_gate37.jpg)
You can see a shot with the
room lights off, and the rope lights illuminated. The other picture is
just of the sign primed and waiting to be moved to the paint room. You
can see the base and capstones in the background, along with some
reference pictures of rock structures with cracks in them for creating
the cracks in those pieces with the wood burner tool.
![[Click to enlarge image]](images/gate/tn_gate48.jpg)
This picture is the back of the
sign built earlier, in the paint room after being coated with a rust
color paint and then roller topped with flat black to give the
impression of a rusted iron sign. It was finished off with a blast of
gray paint shot into the air over the sign, with the sign standing up,
finely atomized from my HVLP sprayer to give it the appearance of
dust/dirt settling over it over time. You can see the cylinder
of the in progress corpse
coffin flailer mechanism just behind the sign, to the left of the
yellow mig welder.
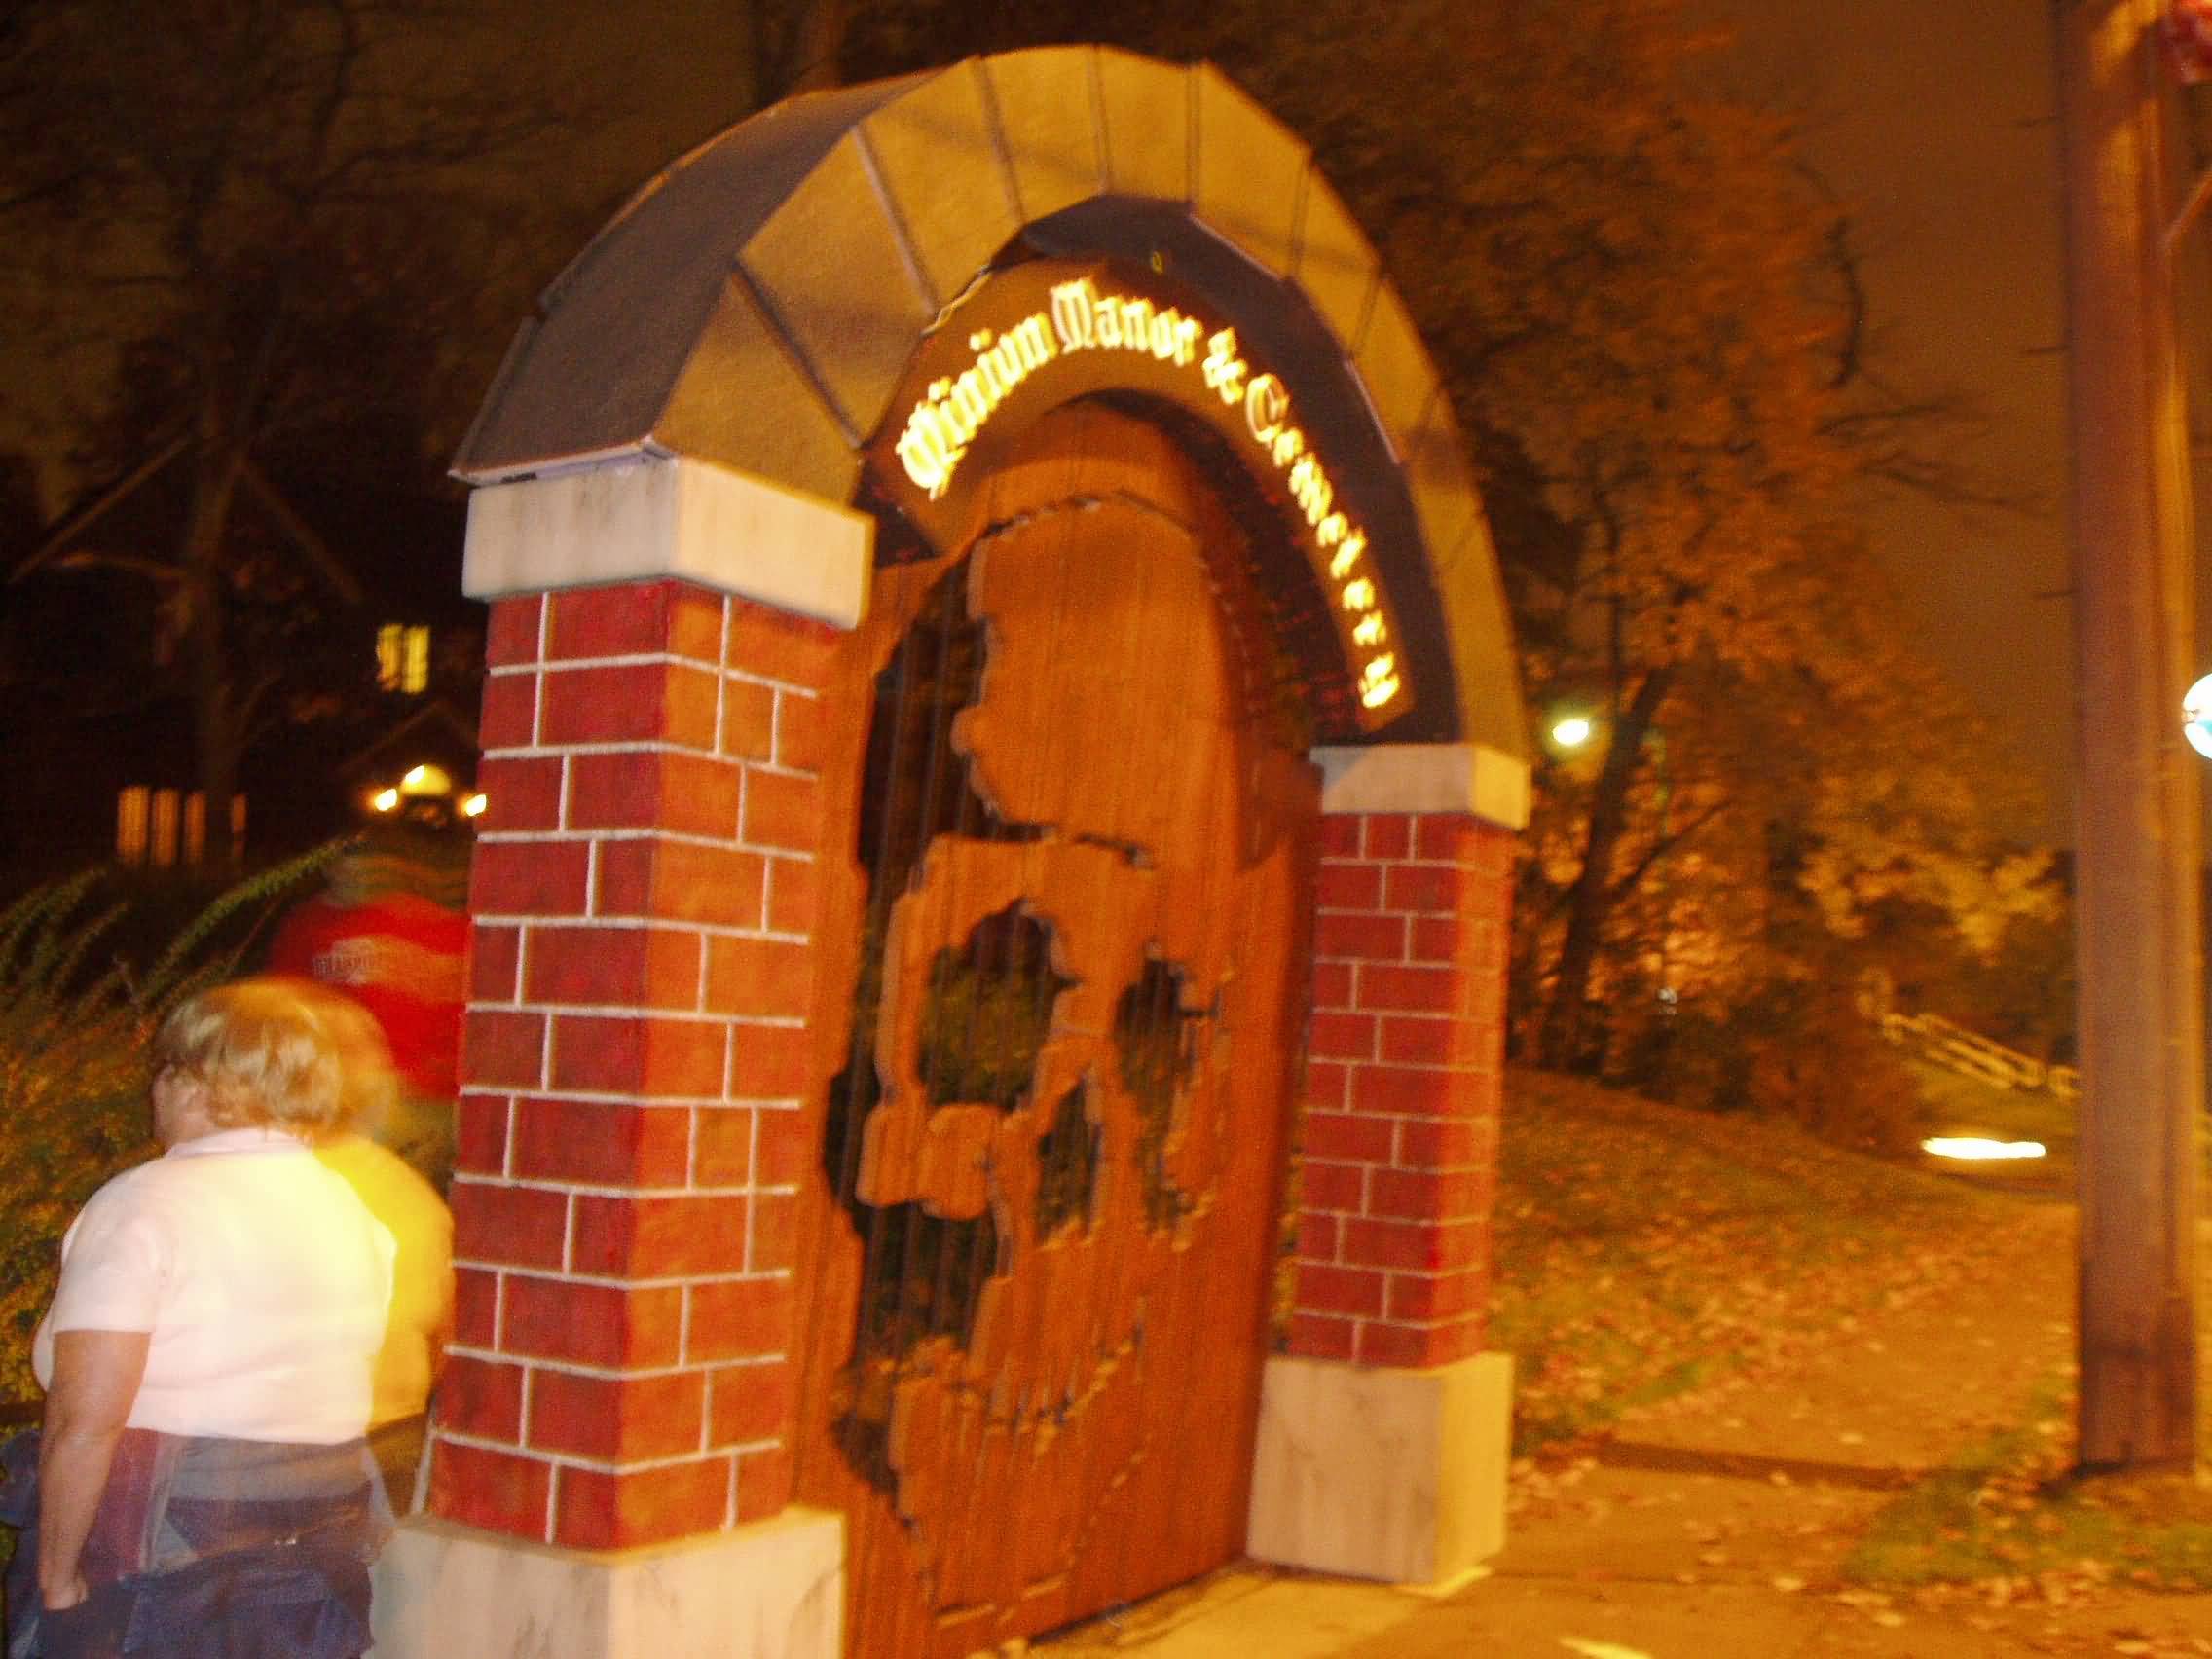
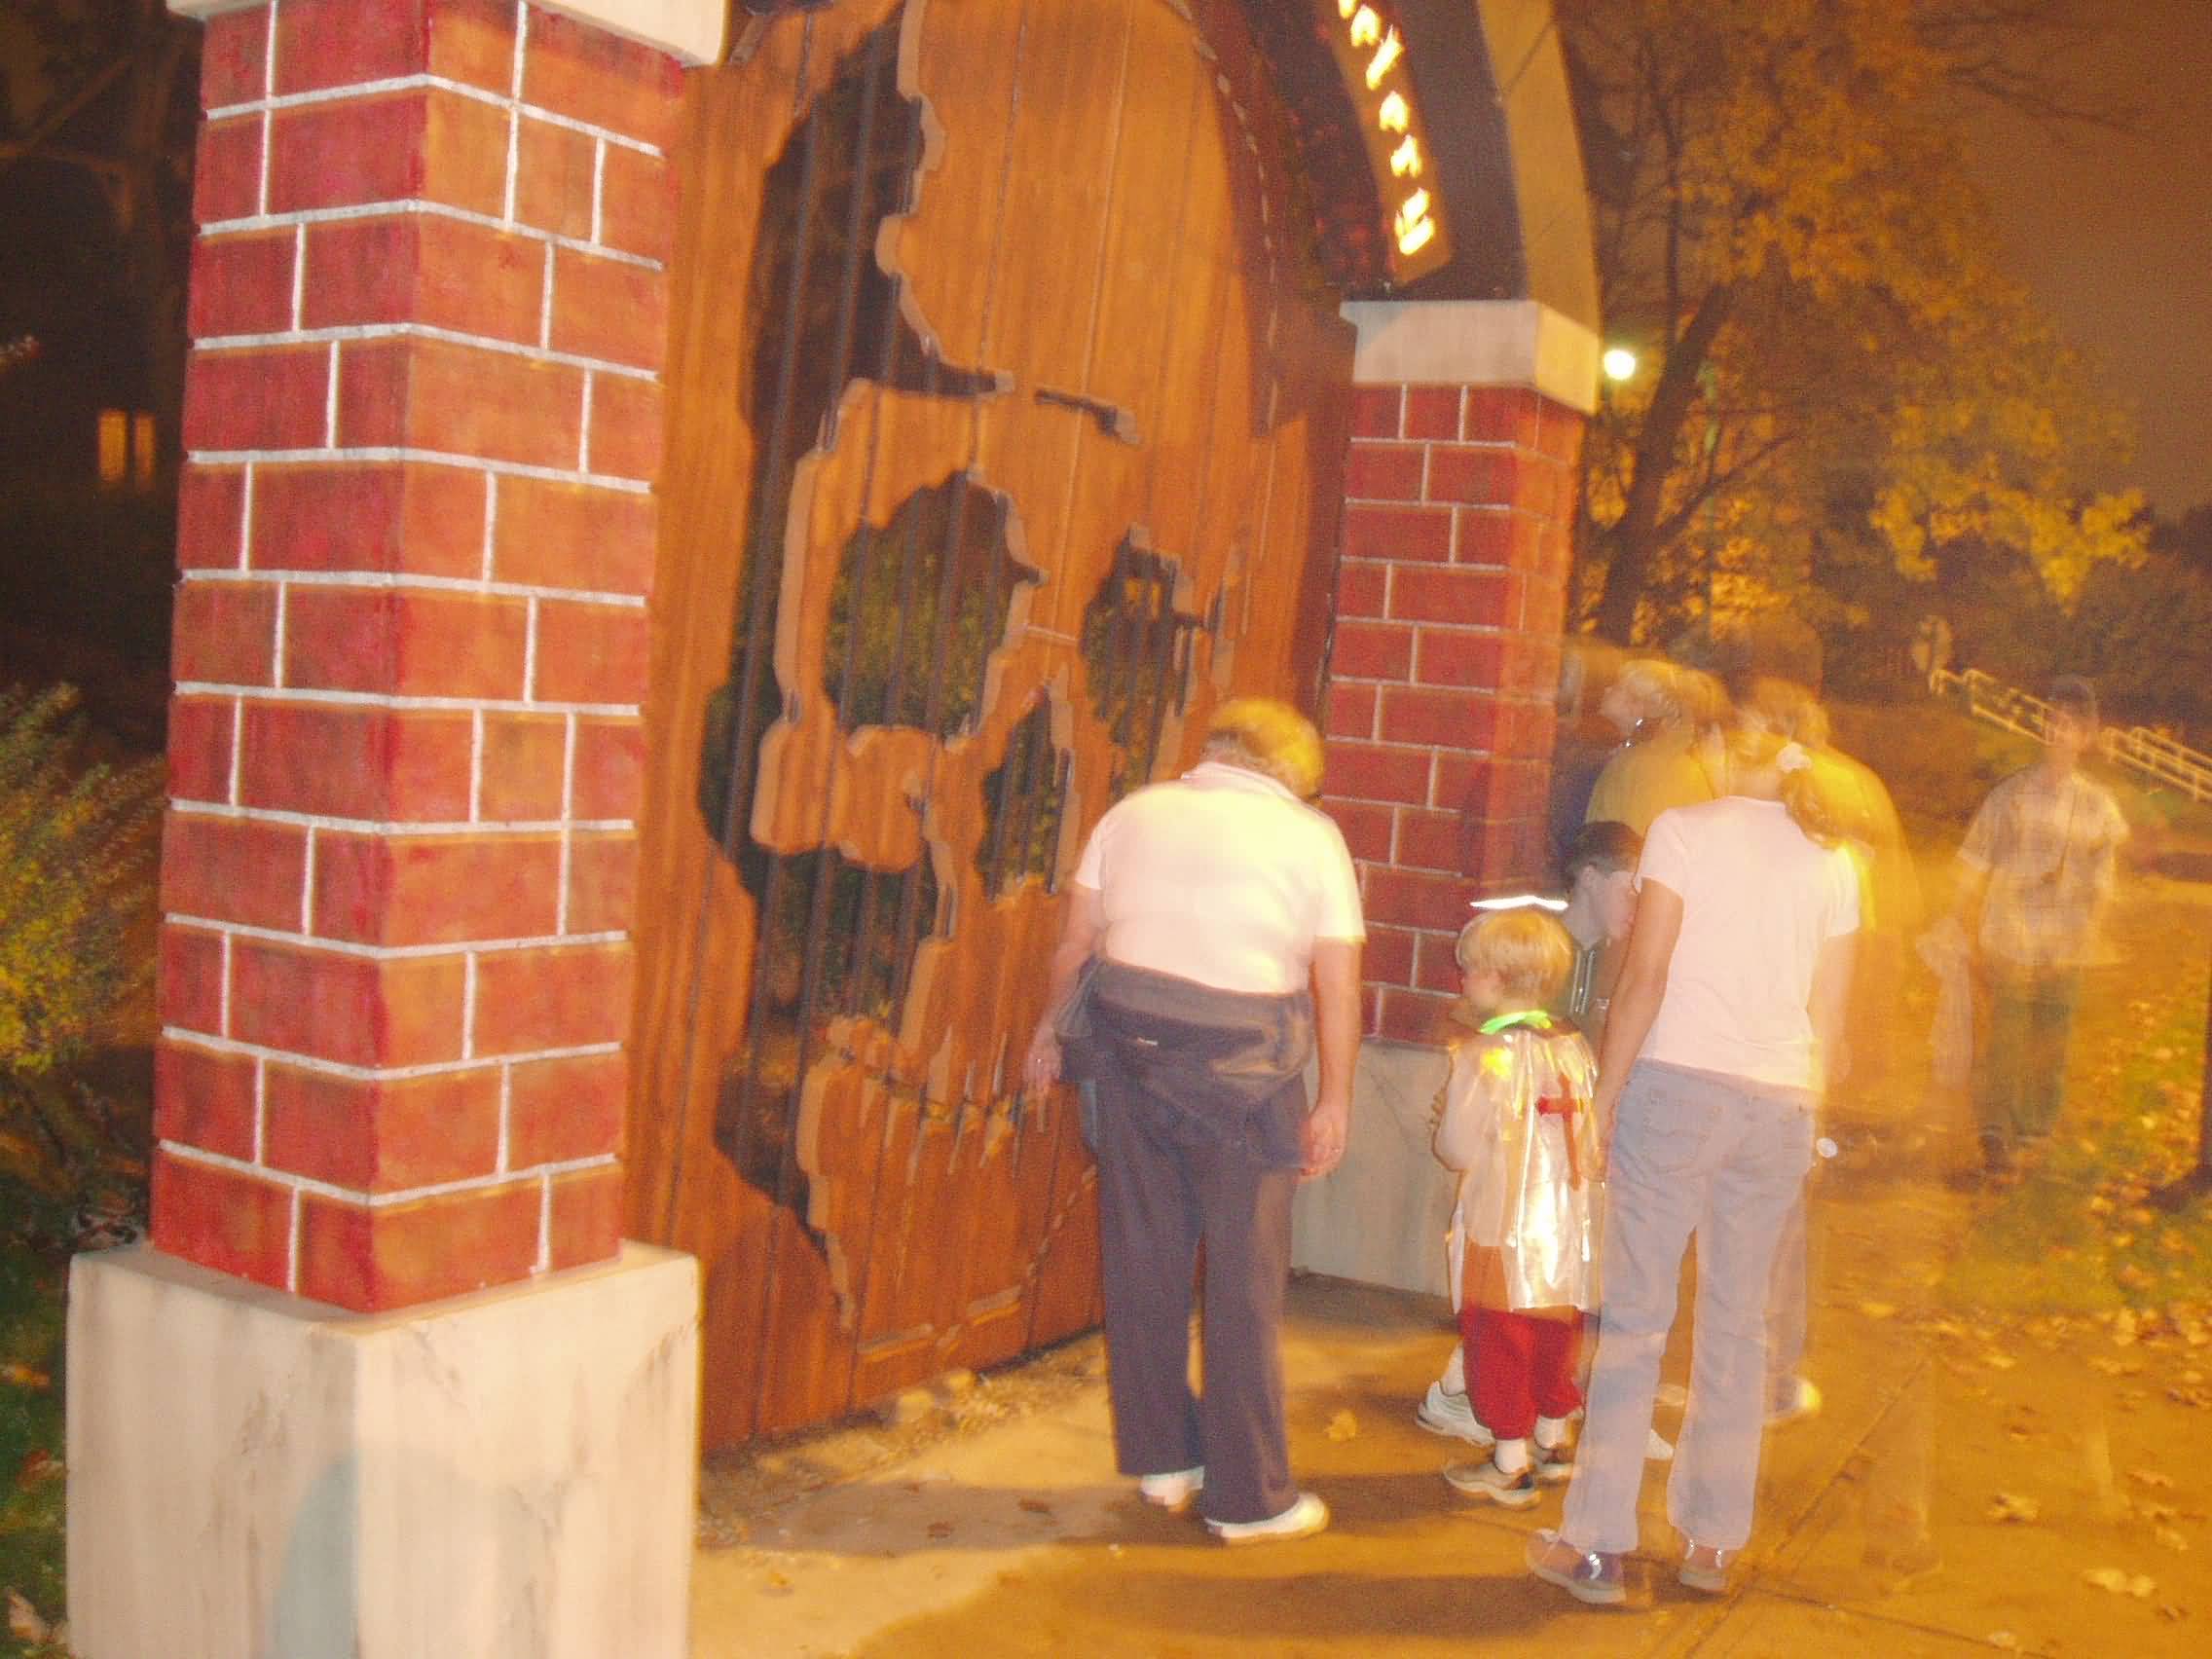
Here is the completed sign hanging in place during the 2003
haunt.
![[Click to enlarge image]](images/gate/tn_gate38.jpg) ![[Click to enlarge image]](images/gate/tn_gate39.jpg)
In these shots, the framing is
being made and installed in the pillar components. Since I have to
hinge the gates, the structure needs to have some support to hold the
gates on, to hold the sections together (it
is modular for easier moving and storage), for wiring connections
to be mounted to, and something substantial to anchor the whole
assembly to the ground with.
![[Click to enlarge image]](images/gate/tn_gate40.jpg) ![[Click to enlarge image]](images/gate/tn_gate41.jpg)
Here you can see the base
stones have been sculpted with cracks, and paint being applied. The
cracks all got undercoated in flat black, with the rest of the base
and cap stones being undercoated in a sage color.
![[Click to enlarge image]](images/gate/tn_gate42.jpg) ![[Click to enlarge image]](images/gate/tn_gate43.jpg)
Remember the brick pillars
being sculpted and textured?? the one on the left has been base
painted, and the one on the right has the mortar and some tones added
to it. The finished brick had some 6 colors on it in a variety of
methods of application, from flat out total coverage (base coat), high
area roller applications, dry brushing, sponging, and finally aging
with wetting down the pillars and applying black paint with s detail
roller, then going back after a 5 or so minutes of drying time and
using a spray bottle to force the paint to creep and run, making the
brick (and base/capstones),
look they had been outdoors for a long time. The other picture is
after using the HVLP on a very coarse spray setting to speckle the
base and capstones with a sandstone/cream color. The cracks shown
earlier will be enhanced later when I apply the aging (look for
that finish in the final shot in the series). Amazing how the dark
sage color really is no longer obvious, but gives a great tinge to the
pieces.
![[Click to enlarge image]](images/gate/tn_gate44.jpg) ![[Click to enlarge image]](images/gate/tn_gate46.jpg)
Halves of the main arch before
the are glued end t end to make the faces of the arch, and slotted
18" strips 8' long for making the upper and lower walls of the
arch. Since the walls are so wide, they wouldn't cooperate with the
arc of the arch and had to be slotted to permit the foam to be bent
enough to make the form. I explain this technique on the tombstones
page.
![[Click to enlarge image]](images/gate/tn_gate47.jpg) ![[Click to enlarge image]](images/gate/tn_gate049.jpg)
The same technique described to make the sign is used here to make
the arch. The other picture is a montage to give you a rough idea of
the size of the arch, since it is almost 14' end to end, and just
under 6' tall completed.
![[Click to enlarge image]](images/gate/tn_gate051.jpg)
The first picture is a shot
showing the other face being applied and some of the clamping used to
hold this monster together. Yes, I said clamping, granted its foam
board, but if you use some stiff material like wood shims or in this
case, plexi scraps, then you distribute the clamping pressure to a
wider area without damaging the item.
![[Click to enlarge image]](images/gate/tn_gate053.jpg) ![[Click to enlarge image]](images/gate/tn_gate052.jpg)
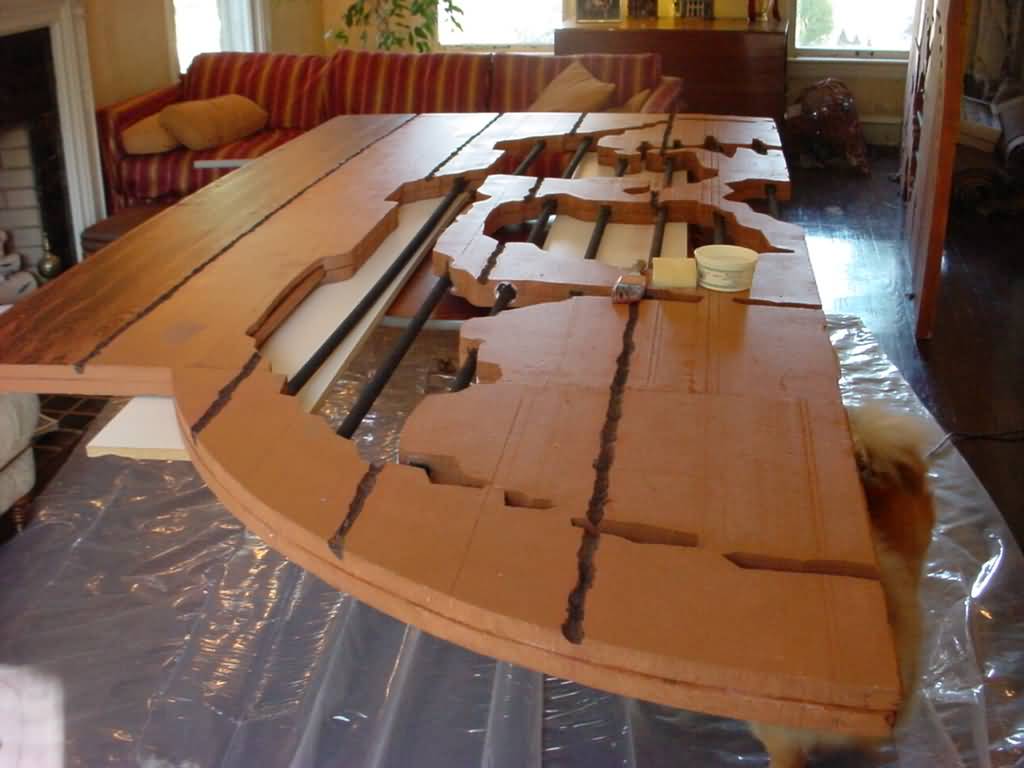
First picture shows the door components being prepped for gluing.
Each gate door has 2 of these making a sandwich to hold the bars, and
the gate hinge supports. In the second picture you can see the both
whole door panels curing. I used the paint cans to add weight to
prevent the packing tape from pulling the boards too much out of the
flat position.
![[Click to enlarge image]](images/gate/tn_gate055.jpg) ![[Click to enlarge image]](images/gate/tn_gate057.jpg)
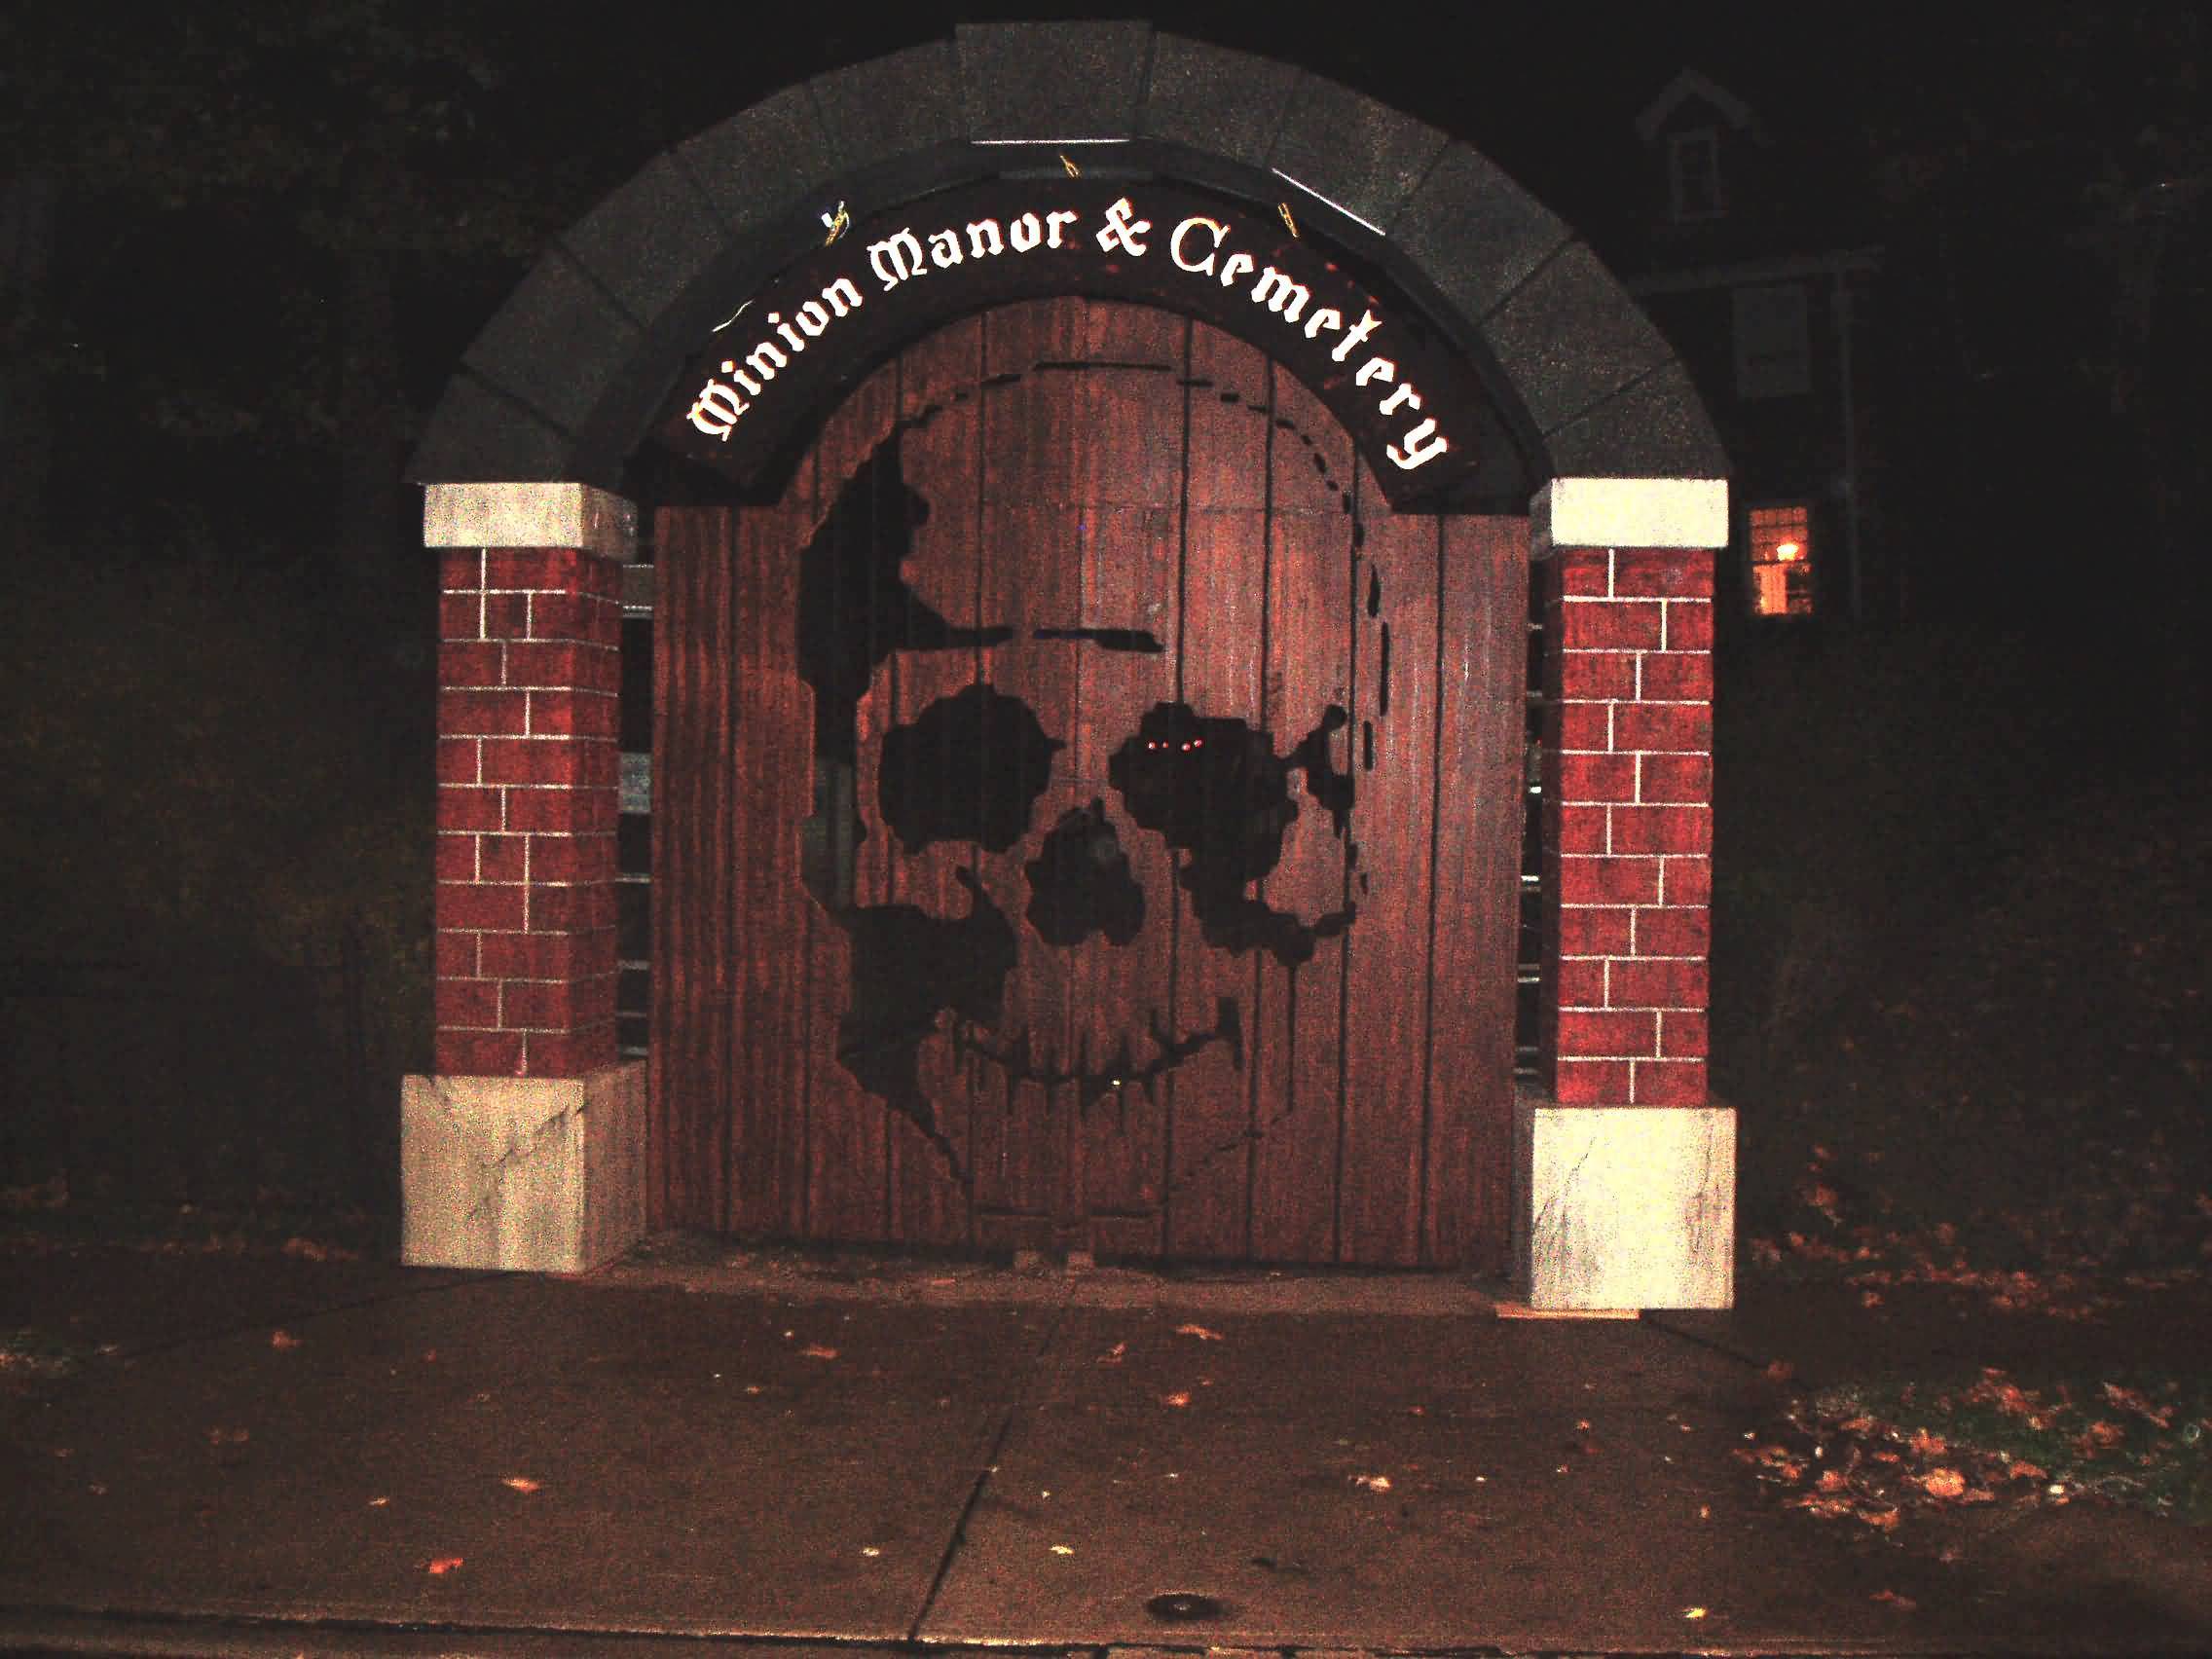
The first picture shows the
template for cutting out the skull face from the door taped in place
waiting to go. This was produced with the Poster7
software mentioned earlier. The entire pair of doors template was made
from 285 sheets of 8.5x11" paper taped together. Considering the
doors are 4'-9" x 10'-6" tall, I thinks its pretty
reasonable. The second shot shows the negative sections of the skull
cut out. This was done with a rotozip bit in a dremel mounted in a
router base. I found that the bit was long enough so that by taping 2
door panels together, you could get the pattern into the second layer,
without having to trace it from the first after the fact. This made it
pretty quick to prep and cut the second section of door.
![[Click to enlarge image]](images/gate/tn_gate054.jpg) ![[Click to enlarge image]](images/gate/tn_gate058.jpg)
This shot shows the bars and the hinge support/door stiffener in
place before gluing on the other panel to make a sandwich of the
works. All the areas for the bars were routed out so the bars would
each be nested half way in each panel. In the other picture the panels
have been glued together and taped just about everywhere to hold it
all together while PUG cures. While that was going on we took
advantage of the time and painted the bars black. After that was done,
I cut sections of foam pipe insulation and covered the bars, and
sprayed the doors with the light brown base coat of paint. The pipe
insulation protected the bars from the brown paint, and were stripped
off in moments. This was a good cheap mask to protect the bars. After
that, the doors will sculpted with a pneumatic die grinder to give it
the appearance of being made of wood boards and then be grained (not
done yet, ran out of time, in the dark, no one knew).
With the door base
painted it is time to make grooves for the appearance of
seperate boards being used to comprise the door assemblies.
The first step is to measure out the doors and then snap
chalk lines on them to get the basic orientation. If you
view the picture large you can make out the chalk lines on
the door.
Once done, I used 2 soldering irons to melt the
grooves into the foam. First a line to get the basic groove
to follow using a standard weller 100 watt soldering iron,
the pistol variety (probably could skip this step).
Next a heavy groove
was made using a lead window iron (approx. 300 watts)
making all the panel divisions on both sides of the door.
These grooves get painted in black to provide depth and
imply the seperate planks. A nice thing about this step is
it takes advantage of dings and blemishes by adding that
aged look to the grain of the wood. I dragged a hammer,
boards and swung chain lightly onto the foam before
graining.
Now the sections get painted with the grain color,
and let to set for about 2-5 minutes, you want the paint not
to wet, and really its easiest just smearing on in a
few spots and then wiping into the whole area leaving a very
thin coat. Using a graining tool (most paint stores and
art supply places sell em) drag the length of the plank
rocking the graining tool back and forth to alter the
consistency of the graining. If you don't like the results,
just paint right back over it and do it again! To cover each
section, the graining tool went 4 or so passes down the
length, with the paint still damp, it just blends together.
For more depth, you could use areas of lighter or darker
colors on the base coat.
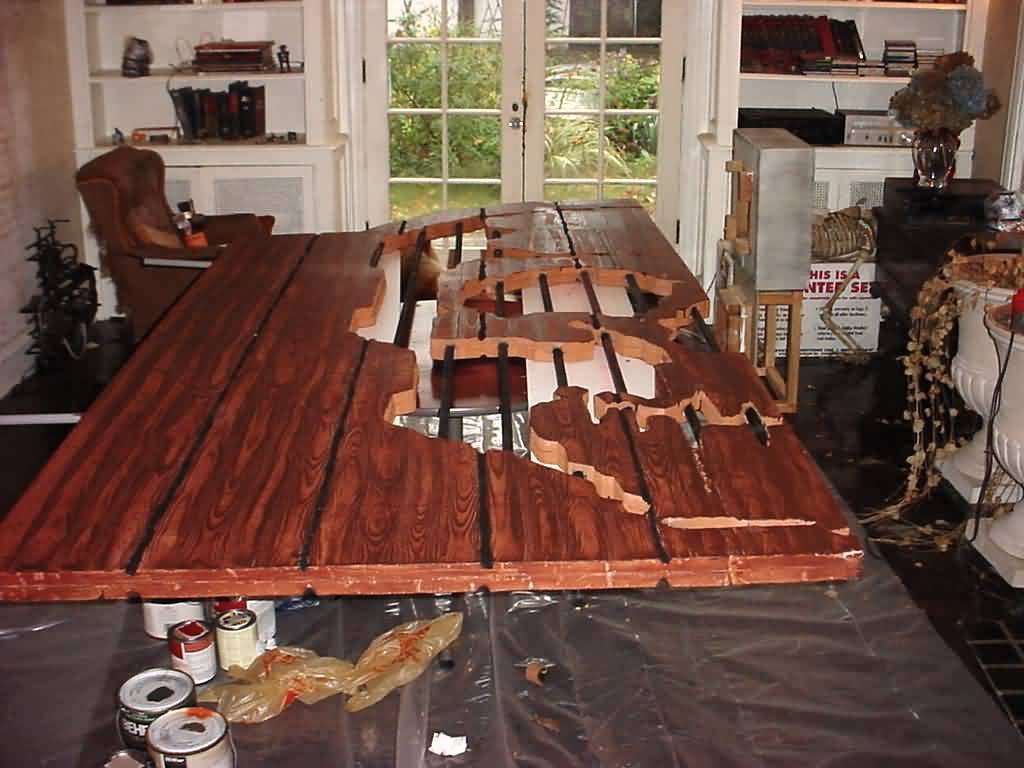
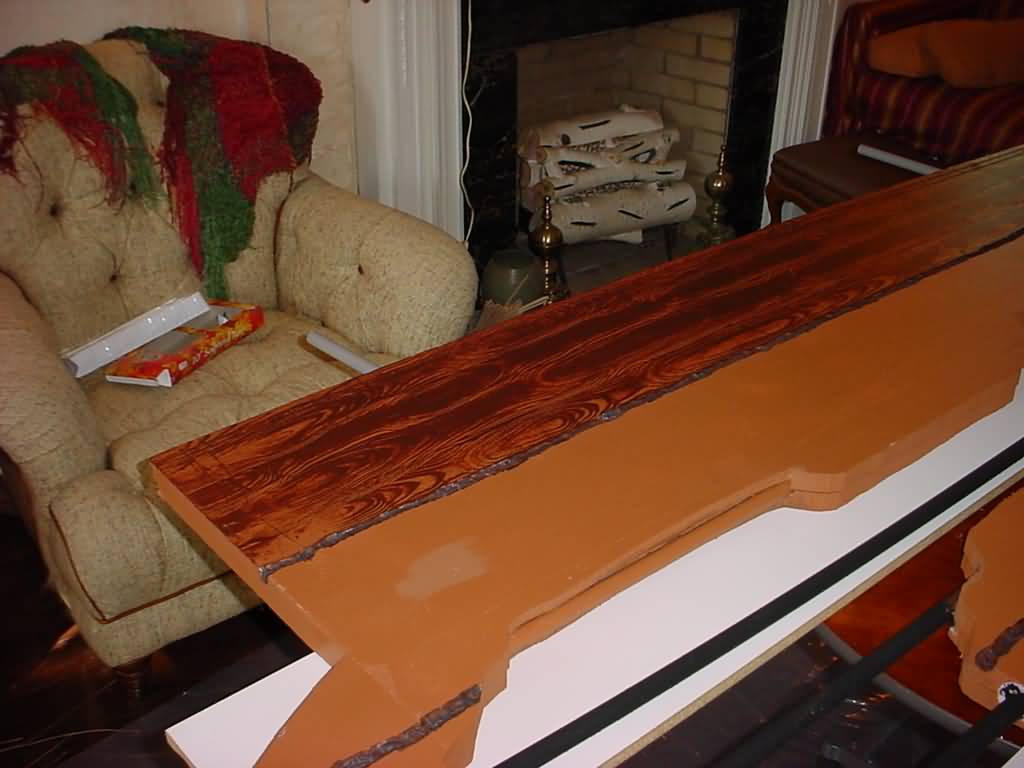
Here is a picture of one door side completely grained.
This last shot is of
Scott, who helped me tons with this project, next to the pillars for
scale, just before we took the down for tweaks and storage for the off
season.
![[Click to enlarge image]](images/gate/tn_gate059.jpg)
I wish I had a shot of
the project as it stood on Halloween night (see below, as I have
recieved pics from folks who got some ok shots of the gate)
![[Click to enlarge image]](images/gate/tn_gf1.jpg) ![[Click to enlarge image]](images/gate/tn_gf3.jpg)
But almost as soon as the
ToTers stopped coming, the wind kicked up, and I hadn't secured the
arch to the pillars, and dreaded the arch and sign coming crashing
down to the ground.
![[Click to enlarge image]](images/gate/tn_gf2.jpg)
Just before we took it
apart, a blazer pulls in the end of the driveway and just sits there
for about 5 minutes, lights on and motor running. A few of us walk on
down to see what the deal is, a guy and his girlfriend out, and
introduce themselves. They tell us they have been driving by the house
the last few halloweens, since they like what I have been doing. Then
he asks if the pillars have always been here and if he somehow never
noticed them? I said, nope we just put the up a few hours ago. He then
asked how we got them to look like old construction. Thats when i told
him its not stone or brick, but rather foam board. He refused to
believe me for a few minutes until I told him to rap on the brick with
his knuckles. He just about lost it laughing and asked if he could
help out next year, that this was the coolest thing and couldnt
imagine how he had missed the pillars for years, that he thought he
had been losing his mind.
Parting pictures from 2003 haunt gate installation.
I didnt learn my lessson in 2002,
and in 2003 the gate had a major disaster. An evening shower rolled
in, a breeze kicked up and toppled the whole gate structure, , the
arch, demolished, the sign, just scuffed, the pillars cracked, but
repairable, and one gate was broken into pieces, the other a small
crack.
This
got me to thinking and for next year, I have a beter mothod
of anchoring and connecting everything together to make it
more structurally sound....details to come!
|


![[Click to enlarge image]](images/gate/gate060.jpg)
![[Click to enlarge image]](images/gate/gate061.jpg)
![[Click to enlarge image]](images/gate/gate1.jpg)
![[Click to enlarge image]](images/gate/gate3.jpg)
![[Click to enlarge image]](images/gate/gate4.jpg)
![[Click to enlarge image]](images/gate/gate5.jpg)
![[Click to enlarge image]](images/gate/gate6.jpg)
![[Click to enlarge image]](images/gate/gate7.jpg)
![[Click to enlarge image]](images/gate/gate8.jpg)
![[Click to enlarge image]](images/gate/gate9.jpg)
![[Click to enlarge image]](images/gate/gate15.jpg)
![[Click to enlarge image]](images/gate/gate10.jpg)
![[Click to enlarge image]](images/gate/gate11.jpg)
![[Click to enlarge image]](images/gate/gate12.jpg)
![[Click to enlarge image]](images/gate/gate13.jpg)
![[Click to enlarge image]](images/gate/gate14.jpg)
![[Click to enlarge image]](images/gate/gate16.jpg)
![[Click to enlarge image]](images/gate/gate17.jpg)
![[Click to enlarge image]](images/gate/gate18.jpg)
![[Click to enlarge image]](images/gate/gate19.jpg)
![[Click to enlarge image]](images/gate/gate20.jpg)
![[Click to enlarge image]](images/gate/gate21.jpg)
![[Click to enlarge image]](images/gate/gate22.jpg)
![[Click to enlarge image]](images/gate/gate23.jpg)
![[Click to enlarge image]](images/gate/gate24.jpg)
![[Click to enlarge image]](images/gate/gate25.jpg)
![[Click to enlarge image]](images/gate/gate26.jpg)
![[Click to enlarge image]](images/gate/gate27.jpg)
![[Click to enlarge image]](images/gate/gate28.jpg)
![[Click to enlarge image]](images/gate/gate29.jpg)
![[Click to enlarge image]](images/gate/gate30.jpg)
![[Click to enlarge image]](images/gate/gate32.jpg)
![[Click to enlarge image]](images/gate/gate33.jpg)
![[Click to enlarge image]](images/gate/gate34.jpg)
![[Click to enlarge image]](images/gate/gate35.jpg)
![[Click to enlarge image]](images/gate/gate36.jpg)
![[Click to enlarge image]](images/gate/gate37.jpg)
![[Click to enlarge image]](images/gate/gate48.jpg)
![[Click to enlarge image]](images/gate/gate38.jpg)
![[Click to enlarge image]](images/gate/gate39.jpg)
![[Click to enlarge image]](images/gate/gate40.jpg)
![[Click to enlarge image]](images/gate/gate41.jpg)
![[Click to enlarge image]](images/gate/gate42.jpg)
![[Click to enlarge image]](images/gate/gate43.jpg)
![[Click to enlarge image]](images/gate/gate44.jpg)
![[Click to enlarge image]](images/gate/gate46.jpg)
![[Click to enlarge image]](images/gate/gate47.jpg)
![[Click to enlarge image]](images/gate/gate049.jpg)
![[Click to enlarge image]](images/gate/gate051.jpg)
![[Click to enlarge image]](images/gate/gate053.jpg)
![[Click to enlarge image]](images/gate/gate052.jpg)
![[Click to enlarge image]](images/gate/gate055.jpg)
![[Click to enlarge image]](images/gate/gate057.jpg)
![[Click to enlarge image]](images/gate/gate054.jpg)
![[Click to enlarge image]](images/gate/gate058.jpg)
![[Click to enlarge image]](images/gate/gate059.jpg)
![[Click to enlarge image]](images/gate/gf1.jpg)
![[Click to enlarge image]](images/gate/gf3.jpg)
![[Click to enlarge image]](images/gate/gf2.jpg)