|

All
information presented
on this website is
presented 'as is',
with no warranty,
suitability,
or fitness
of purpose implied.
I do not accept any
responsibility for any injury
resulting from use
or misuse
of this information.
Your
use of this information
constitutes acceptance
of these terms.
|
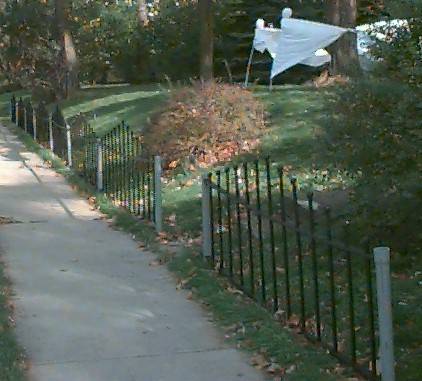
To start with, this is a low cost fence, the greatest single
expense was probably the paint.
To make
two ten footer sections of fencing, get one 2"x4"x10'
(approx. three bucks), and cut it lengthwise, into 4 -
3/4"x10' strips, then mark the pieces on center 6"
in from the ends, and then 9" on center between. Drill
these marks through with a 7/8" diameter drill bit.
I used a forstner bit, since I like a clean exit. Before
you put this all to one side, drill a 3/16" hole 1/2"
from each end.

cut stack showing leftover strip on top

This will give you thirteen holes for fence and two mount
holes.
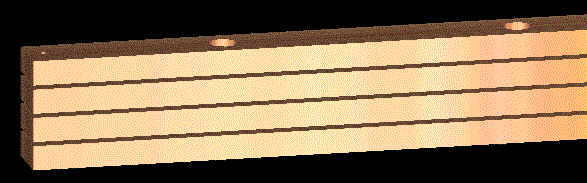
A view of one end as it would be after drilling
and separated.
This is
easiest and fastest if you stack the wood on top of each
other, and drill through the pile, or, drill all holes before
ripping the four stiles.
Next take
8 pieces of 10'1/2" diameter PVC electrical conduit
(.67 cents per), the gray stuff with flared ends, and cut
them like so:
4) 27" long from 1 piece
4) 29" long from 1 piece
3) 31" long from 1 piece
3) 33" long from 1 piece
3) 35" long from 1 piece
3) 37" long from 1 piece
2) 39" long from 1 piece
1) 37" long from the leftovers of the 39"
pieces
1) each 31", 33", and 35" long from 1 piece
Next take
one piece of 2" diameter PVC electrical conduit (2.69
per), and cut it into 4) 30" sections. These will be
the fence posts. Next either saw into the posts to make
a 7/8" slot
2-1/8" from the top and the bottom, towards the center
of the posts on one side, or both sides, if you intend to
make this a post between fence sections.
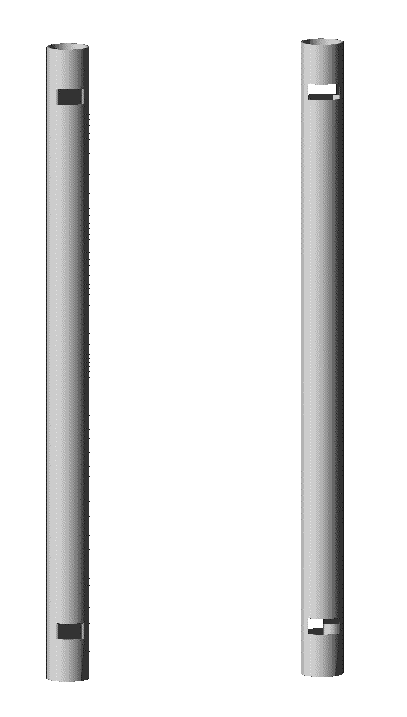
posts cut to length and slotted on one and two sides respectively.
Now take
a leftover piece of the fencing conduit, and solvent weld
it with PVC cement into the interior of the post at the
bottom of the post, as it is laying on its side, with the
slot oriented ninety degrees to the bottom. You could also
use liquid nails to fasten it. Additionally for a little
added stabilty I sprayed in some Great
Stuff™ Expanding Foam above and below the lower
fence retaining slots to minimize possible movement.
This is
where you set the post onto rebar.
|
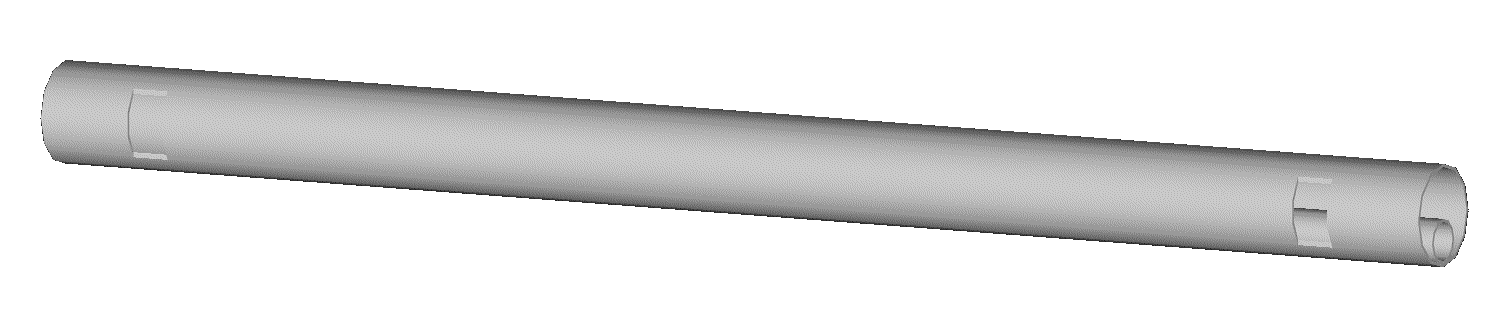
image of post on side with mount welded to interior
All you
need to do now is paint the fence. A roller works well on
the wood. Flat black enamel dries quickly.
Use a
brush to do the bars and posts, or a HVLP sprayer works
well, if you have a room to spray the hell out of, or outdoors
if the weather is nice. Personally I painted the whole fence
section after it was assembled.
Now assemble
the fence sections, with the shortest pieces towards the
ends, and the 39" piece in the center.
Use a
few pieces of scrap 2"x4" on the side as a guide
to give the height of the bottom stile (1.5") in relation
to the bars.
Then attach
those together. I found a nail gun with 7/8" brads
worked great and was quick.
Now measure
24" from the top of the bottom stile. This is where
the top stiles bottom edge sits. Slide upper stile into
place and fasten.
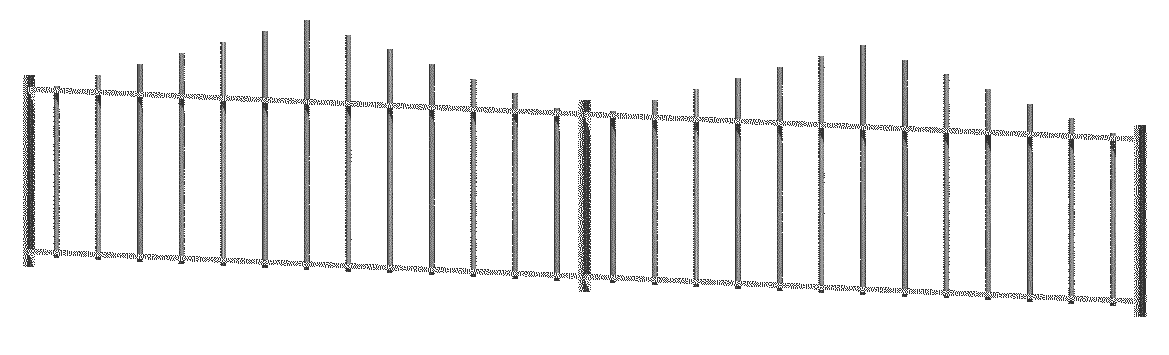
The fence should look like above.
You might need to touch up the paint on the bars.
To assemble
the sections and posts, place a post on a piece of rebar,
insert one fence section end into the slots of the post.
Drop 4" roofing nail into the 3/16" holes you
drilled into the ends of the stile.
Begin
to place the next post on a piece of rebar, insert other
fence section end into the slots of the post and slide the
whole thing down on the rebar.
Drop 4"
roofing nail into the 3/16" hole you drilled. Repeat
until fence is assembled in place. If you rest the head
on the upper lip of the post it will hold the fence section
in place tightly.
You can
use 2" PVC plumbing caps to top the posts.
I plan
to vacuum cast some medium size skulls to mount to the caps.
For finials
try out Toyguys
whistles, (I used the skulls) hot glued in place.
I am considering
using c7 flame lamps in the future, for finials on other
sections, with hot glue dribbled down the tips of the bars,
for the melted wax appearance.
Also thinking
of drilling out the tops of the bars a bit to allow hookup
of the air compressor to some of the bars so the whistles
can blow on cue. They make a very owl-like sound.
Now I
made 100 feet of fence for under 75.00 bucks including enamel
paint, 2"x4"s, all the PVC conduit, endcaps for
the posts, long nails to secure the fence sections into
the posts and skull whistle finials.
That's
under 15.00 bucks for 20' of fence.
You can
check out the new cemetery fence design on this
page if you like. Same tools and materials, different
results. |