|

All
information presented
on this website is
presented 'as is',
with no warranty,
suitability,
or fitness
of purpose implied.
I do not accept any
responsibility for any injury
resulting from use
or misuse
of this information.
Your
use of this information
constitutes acceptance
of these terms. |
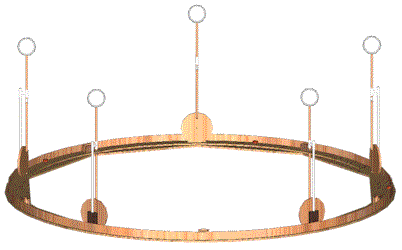
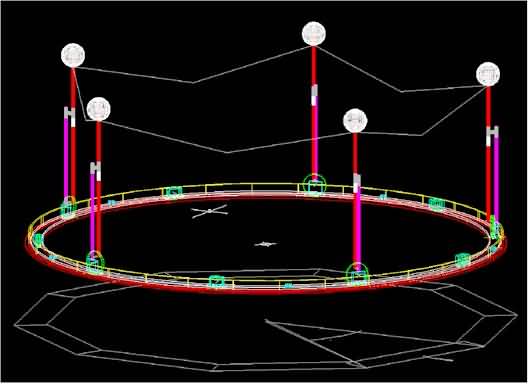
This one is a new bend on one of last years static prop ideas.
Illuminated with a black light for a
good ethereal glow. hmmmm.... sounds like a prop in need of animation, dont you think?
OK, I have been giving this one some thought, and have started working it out.
Start with:
1) sheet 3/4" ply
1) sheet 1/2" ply
2) sheets 1/4" luaun ply
1) piece 1" x 8" pine board 8' long
15) 7/8" x 36" dowels
10) pvc tees 1"
5) pvc reducers 1" x 3/4"
1) piece pvc 1" x 12" cut into 5) 2" pieces
5) pieces 7/8" id clear pvc hose x 4" (1/16" wall thickness is best)
5) wig heads
5) white sheets (or cheese cloth, tuelle, or no-see-um netting)
10) 1/4-20 x 2.5" hexhead bolts
5) 1/4-20 x 2" hexhead bolts
5) 1/4-20 x 1.5" hexhead bolts
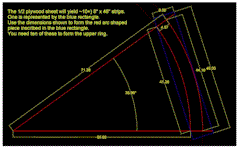
cut:
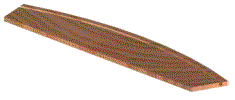
3/4" ply into 10) 48 x 9.5" segments
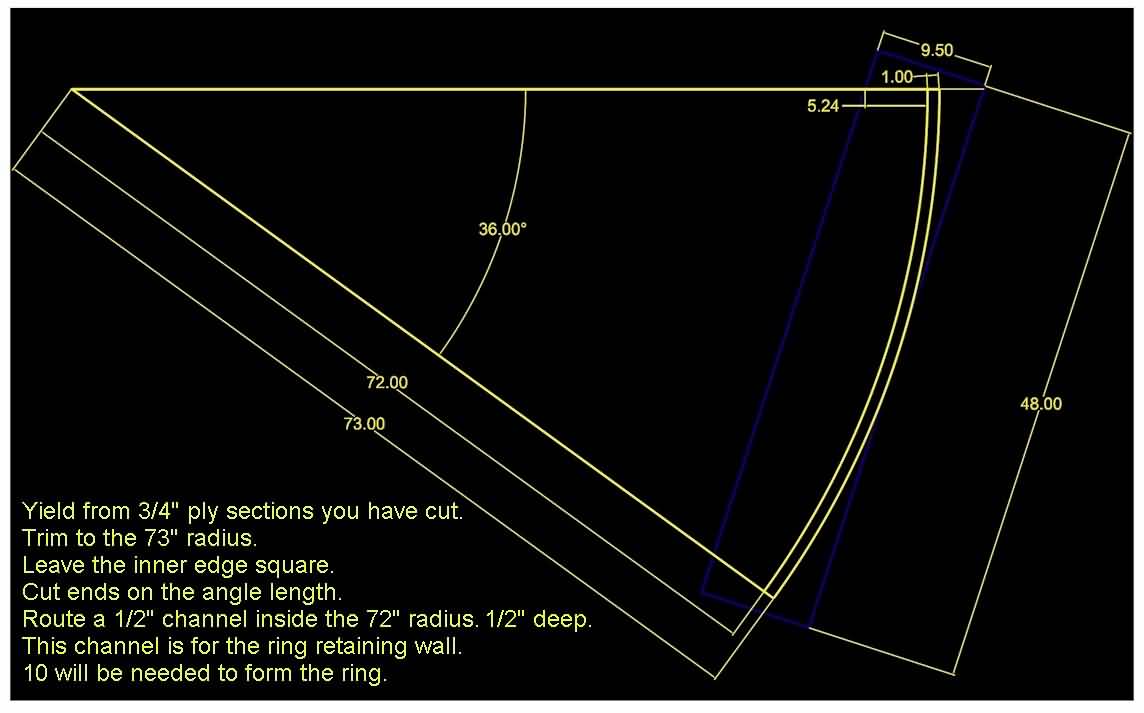
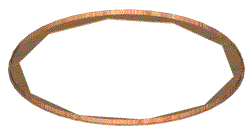
Take the ten pieces you have made once they have been routed with the slot and lay them
out to form a ring. Use metal joiners to attach them together.
cut:
1/4" luaun ply into 20) 48 x 3.5" segments (sheet yields just under 30, save the
extra chunk).
Now take the luaun
slats you have made and insert the first outer band in the slot, gently bending them to
fit. Then insert the rest of the pieces inside the first band. Offset from the edge of the
first pieces end 24 inches, so the second band fits on center to the first band. You will
have to trim 1 piece on each band to remove overlap.
You will need either a
lot of clamps, or a few days to do the next step. Remove 1 piece from the inner band,
apply waterproof wood glue liberally to the back, re-insert and clamp to the outer band
pieces you have just glued. Repeat until all pieces have been glued and connected to form
the laminated lower ring outer wall.
Tack nail the wall
into the slot of the lower ring for added strength.
I am trying to fashion
an upper edge clip to prevent the wall from delaminating.
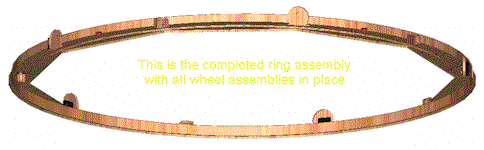
This will be referred to as the lower ring assembly.
At this time, if you
chose you can use the wall as a guide to route the inner edge of the lower ring assembly
to form a circle instead of a tetrahedron. Be sure to make it no narrower than the
distance between the apex of the angles and the wall interior edge.
|
cut:
1/2" ply into 10) 48 x 8" segments
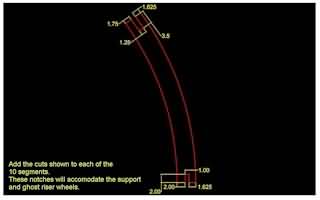
These elements will constitute the upper ring assembly (URA) platform when assembled. Take
the ten pieces you have made
pair up the ends with like size notches, and lay them out to form a ring. Use metal
joiners to attach them together. The larger notch pairs are for the ghost elevator wheel
assemblies, the smaller notch pairs are for the ring wheel assemblies.
cut:
1" x 8" pine board into 10) 2.5" x 4" blocks with as little waste as
possible.
Drill as stated in
diagram below and set aside.
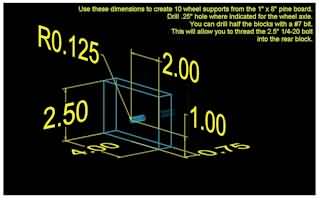
Now you need 5 discs 2.75" diameter from the same board you made the blocks from.
Drill the discs with a 5/16" drill bit on-center. This will be the axle hole.
Sandwich 1 wheel between 2 blocks, with fender washers between the faces of the disc and
blocks. Use 1 block drilled with the hole large enough for the bolt to pass thru in front,
the other block drilled with the #7 bit in the back. These are the ring wheel assemblies.
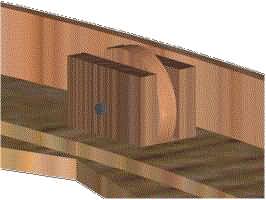
You will have 5 of these assemblies. Mount them to the upper ring assembly at the
appropriate slots. Be sure they clear the the upper ring assembly bottom so that the whole
assembly spins like a lazy susan.
This will give you the parts to make
the 12' basering, and inner ring assemblies segments

More coming soon, even if it kills me! |